Java Application Template
You can customize your Templates through Jinja, which is an engine to create dynamic templates. For more information, see Jinja 's documentation.
You can also use this customization example with your Plugin.
A Java Application Template customization
This Template customization was used to create a Java application.
- For more details see the Template's page on GitHub.
In this Template there are two input variables project_name and group_id. You can use them to customize your Template.
With this Template, you can:
- Automatically create folders and files using inputs;
- Create conditional content using input;
- Replace the information in files that have already been created;
- Perform actions before and after the Template is applied.
See the steps below::
Prerequisites
- You need to have a Template.
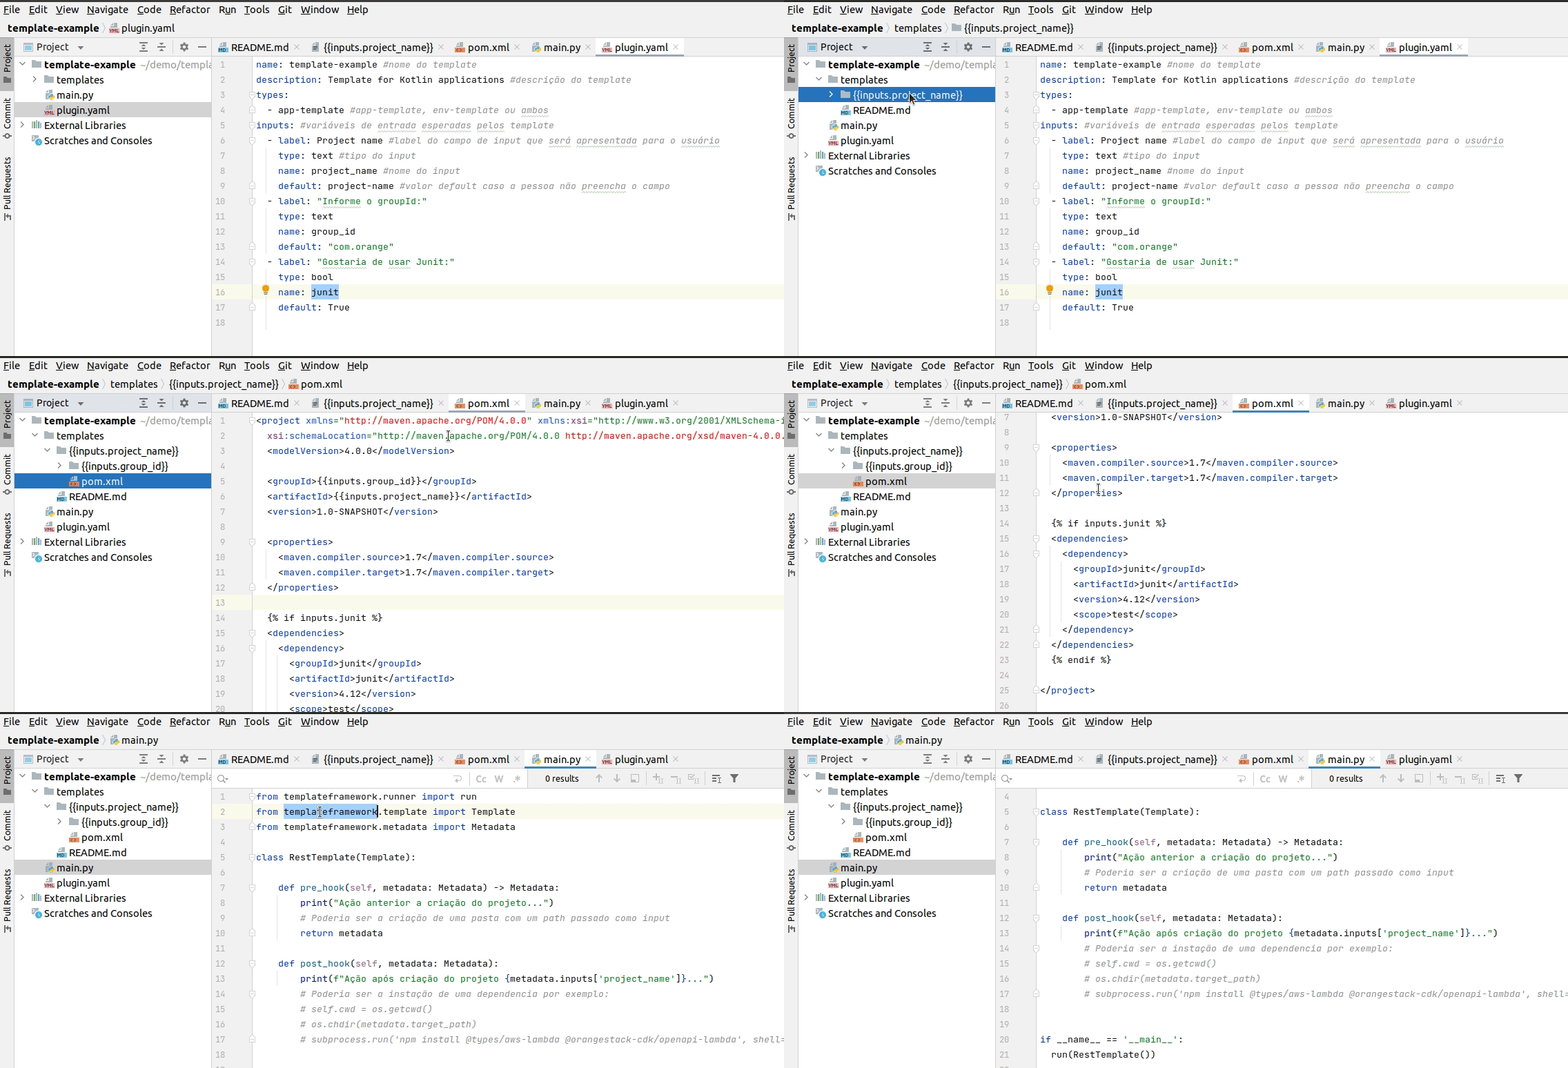
Step 1. Create a new input called junit in the template.yaml file.
This input is used to ask the user if he wants to use junit in his project (it is a test lib.).
Step 2. Create a default pom.xml file to manage the project's dependencies that will be created from your Template
In this file, there are two replacements using Jinja's replacement delimiters:
- {{inputs.group_id}}
- {{inputs.project_name}}
These replacements refer to the Template's inputs. If the inputs appear in the pom.xml file, they will be replaced with the users' content when creating their applications.
Step 3. Use a condition using delimiters {% if (condition) %} {% endif %} to store a condition
The condition is: If you choose to use a junit, you need to add a text about the dependencies, otherwise, it will not.
For more commands and delimiters, see Jinja's documentation.
Step 4. Create two folders and a file using the replaced delimiters and the project_name and group_id inputs
The file's content also contains a substitution.
Step 5. Create a main.py file that contains sample code
You have to do this to perform actions before and after applying this Template.
For example, you have to install some dependencies after creating the application.
The gif below shows the complete example:

Step 6. Test your customization
Create an app using the command below:
stk-legacy create app <aplication_name> --template-path <path_template_local>
Was this page helpful?