IntelliJ
StackSpot Plugin for IntelliJ
StackSpot integrates IDE extensions and Plugins to help speed up the way you develop your applications in major IDEs.
Overview
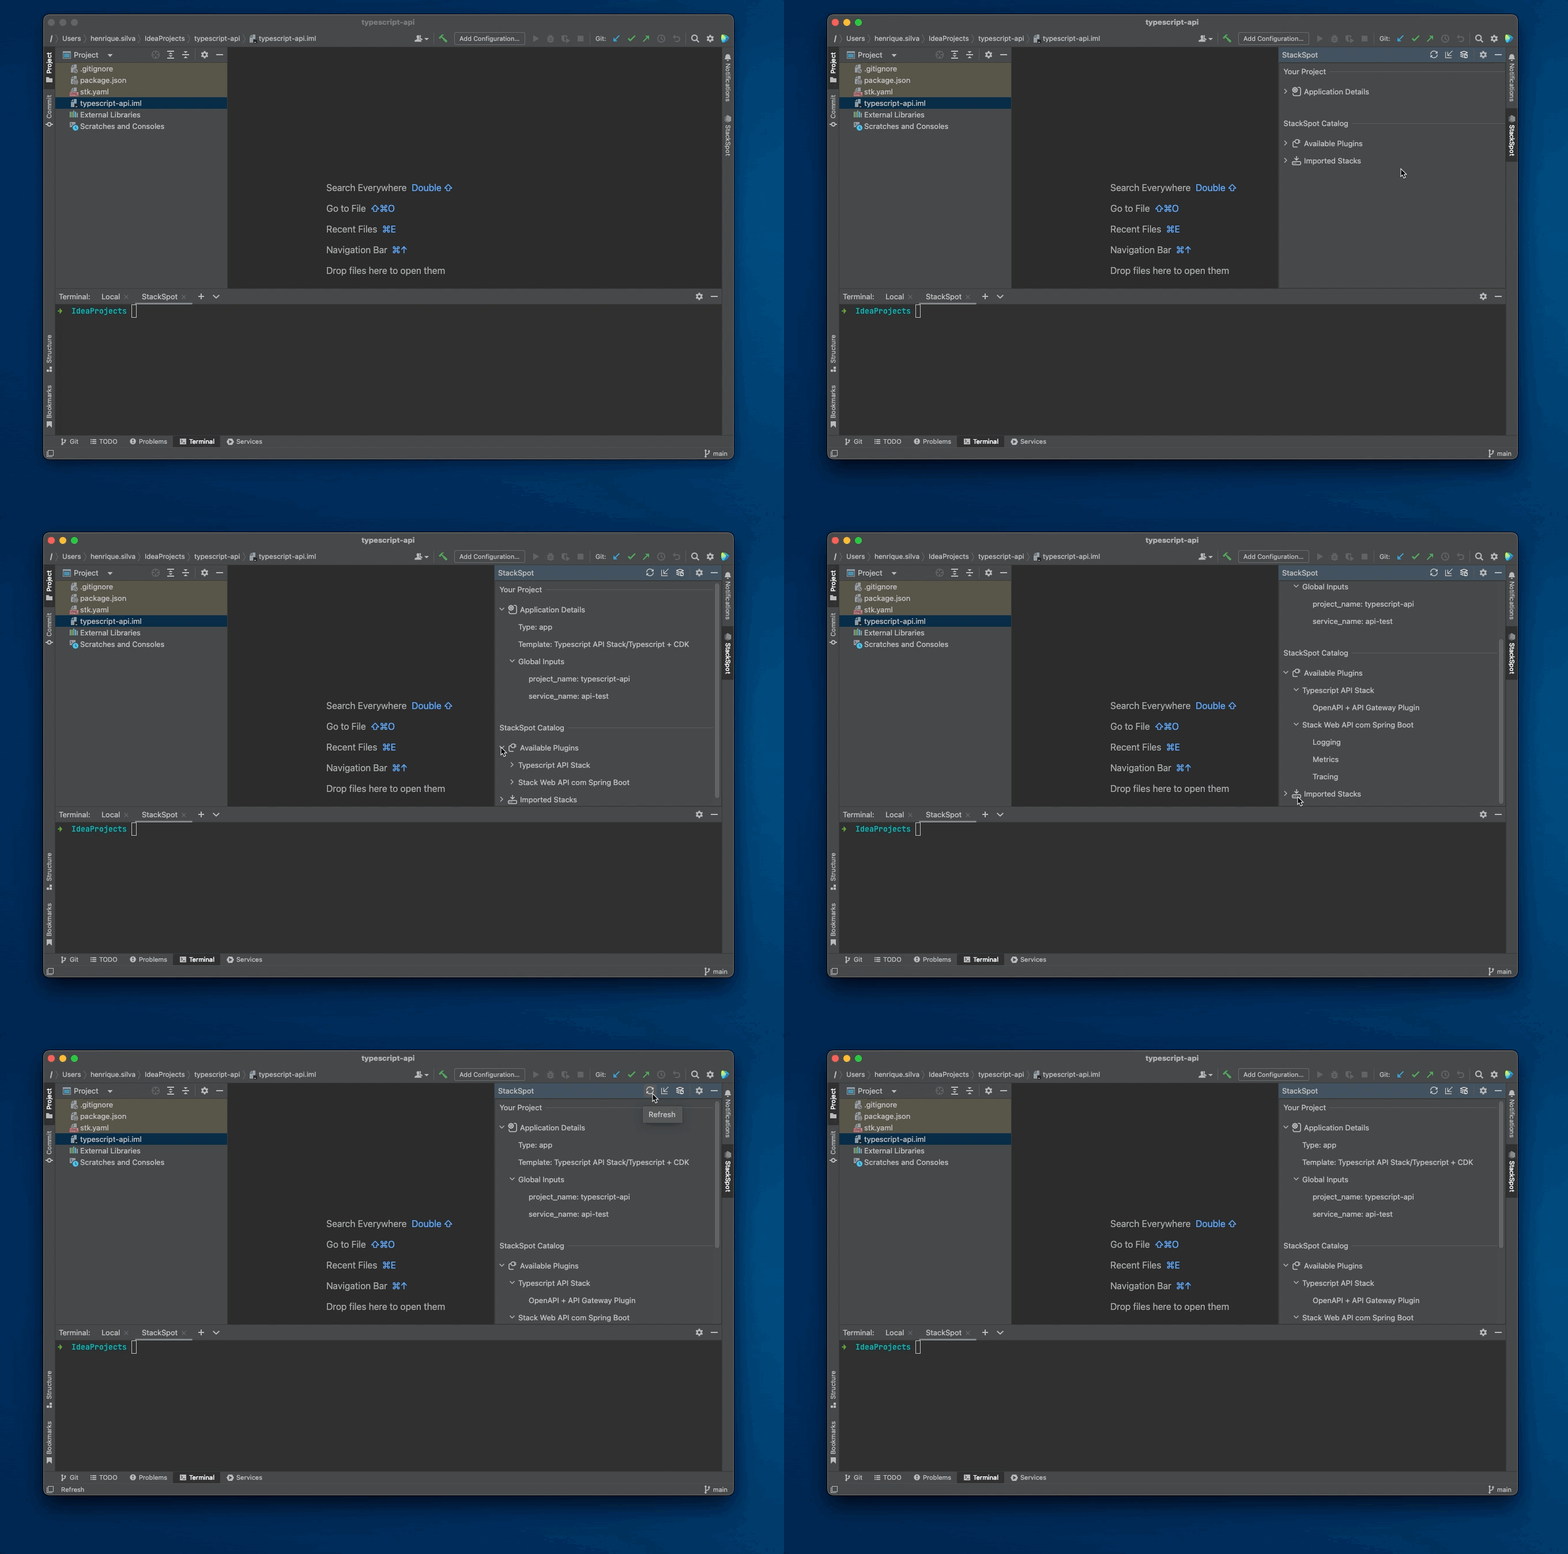
StackSpot's Plugin for IntelliJ brings STK CLI capabilities such as importing and consuming Stacks directly in the IDE with an intuitive interface.
This integration allows you to create your projects and benefit from STK CLI without switching tools during your development.
StackSpot's IDE Extension allows you to:
- Import Stacks.
- Create Projects from Stacks.
- Easy to apply Plugins to your project.
- Use the STK CLI in the IntelliJ terminal.
- Better visualization of your project's Stacks, Stackfiles, and Plugins in an exclusive menu.
- Import Stacks and apply Plugins without directly using STK CLI.
Installation and Setup
Requirements
Check out the requirements below before installing the StackSpot Plugin for IntelliJ:
- IntelliJ IDEA 2022.1.2 or higher.
- STK CLI 3.6.0 or higher.
- Git 2.34 or higher.
Download and Installation
Download the StackSpot IDE Extension in the Jetbrains Marketplace page.
To install, follow the steps from installing Plugins in IntelliJ IDEA
Git Setup
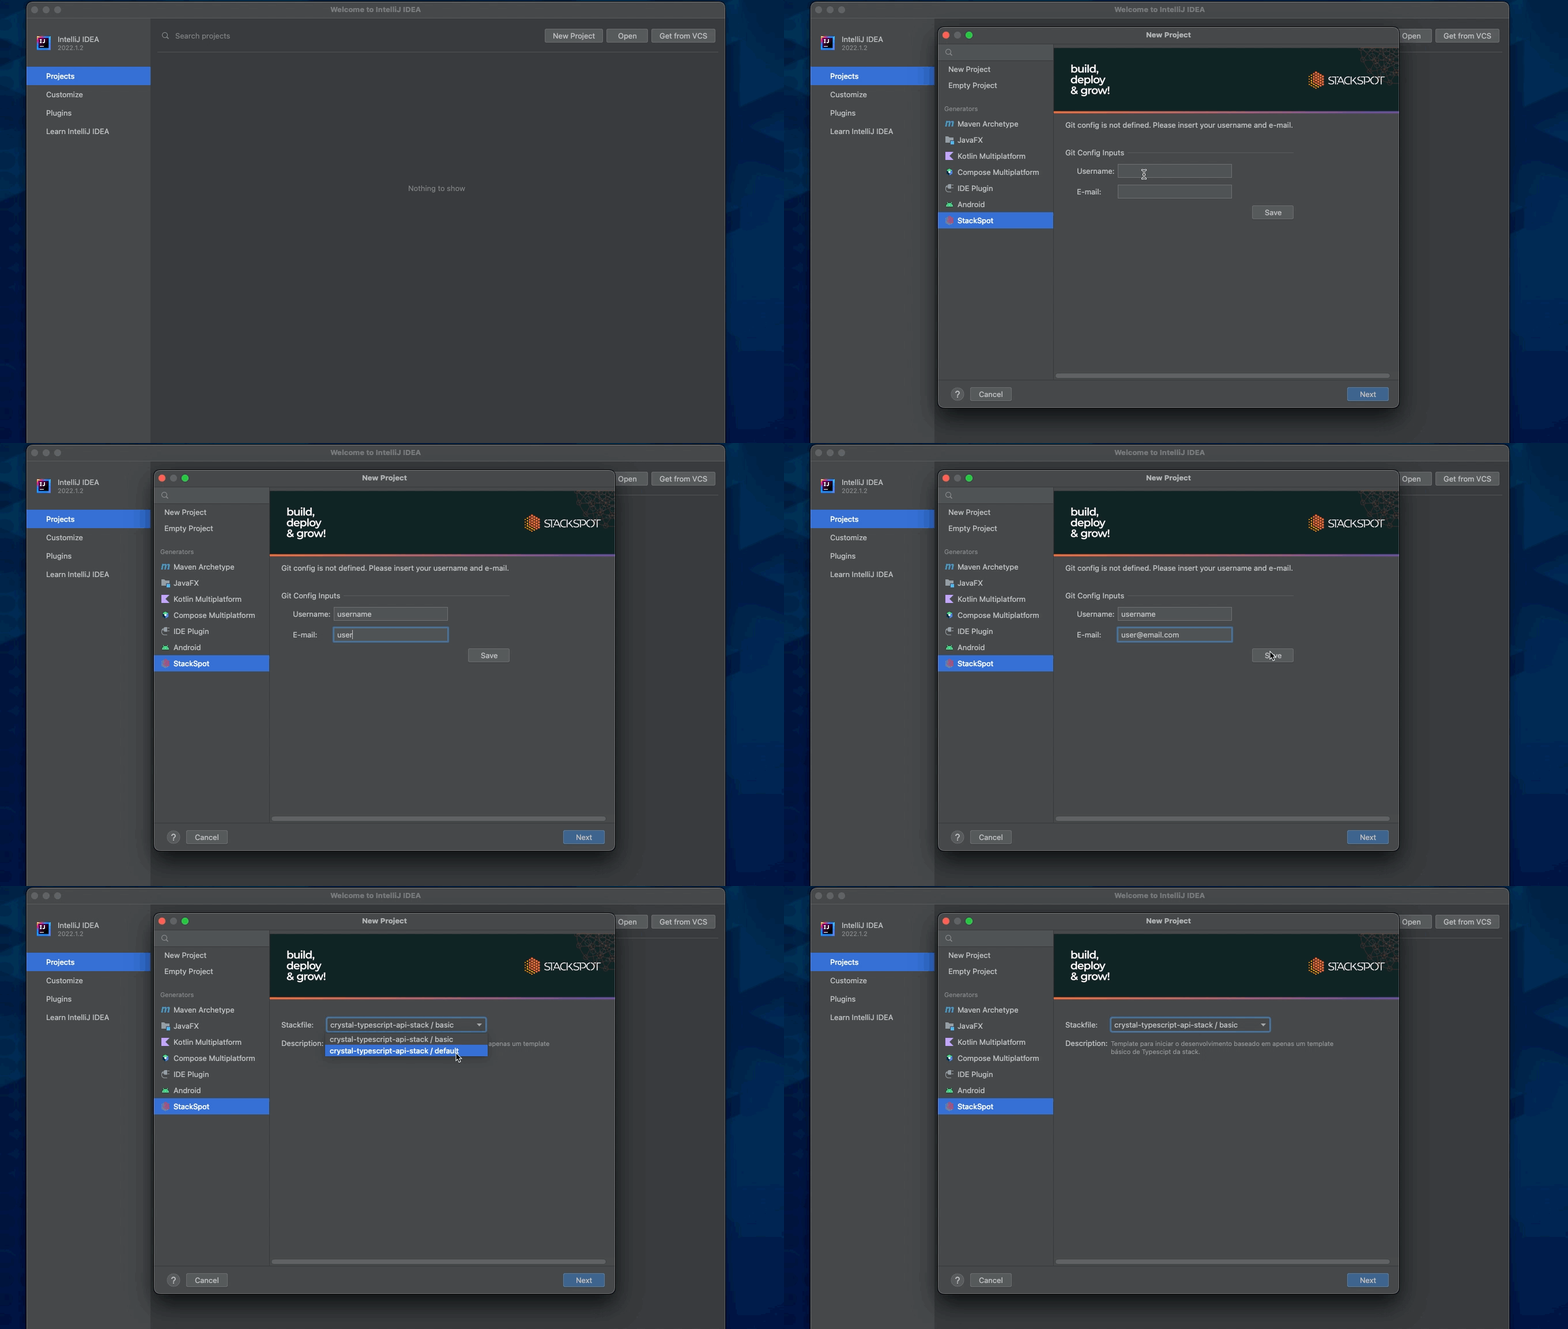
If your Git user is not configured, the StackSpot Plugin displays a screen for you to configure the user and email for your remote repository. Fill in the Username and email fields, see below:
Use the StackSpot Plugin for IntelliJ
Import a Stack
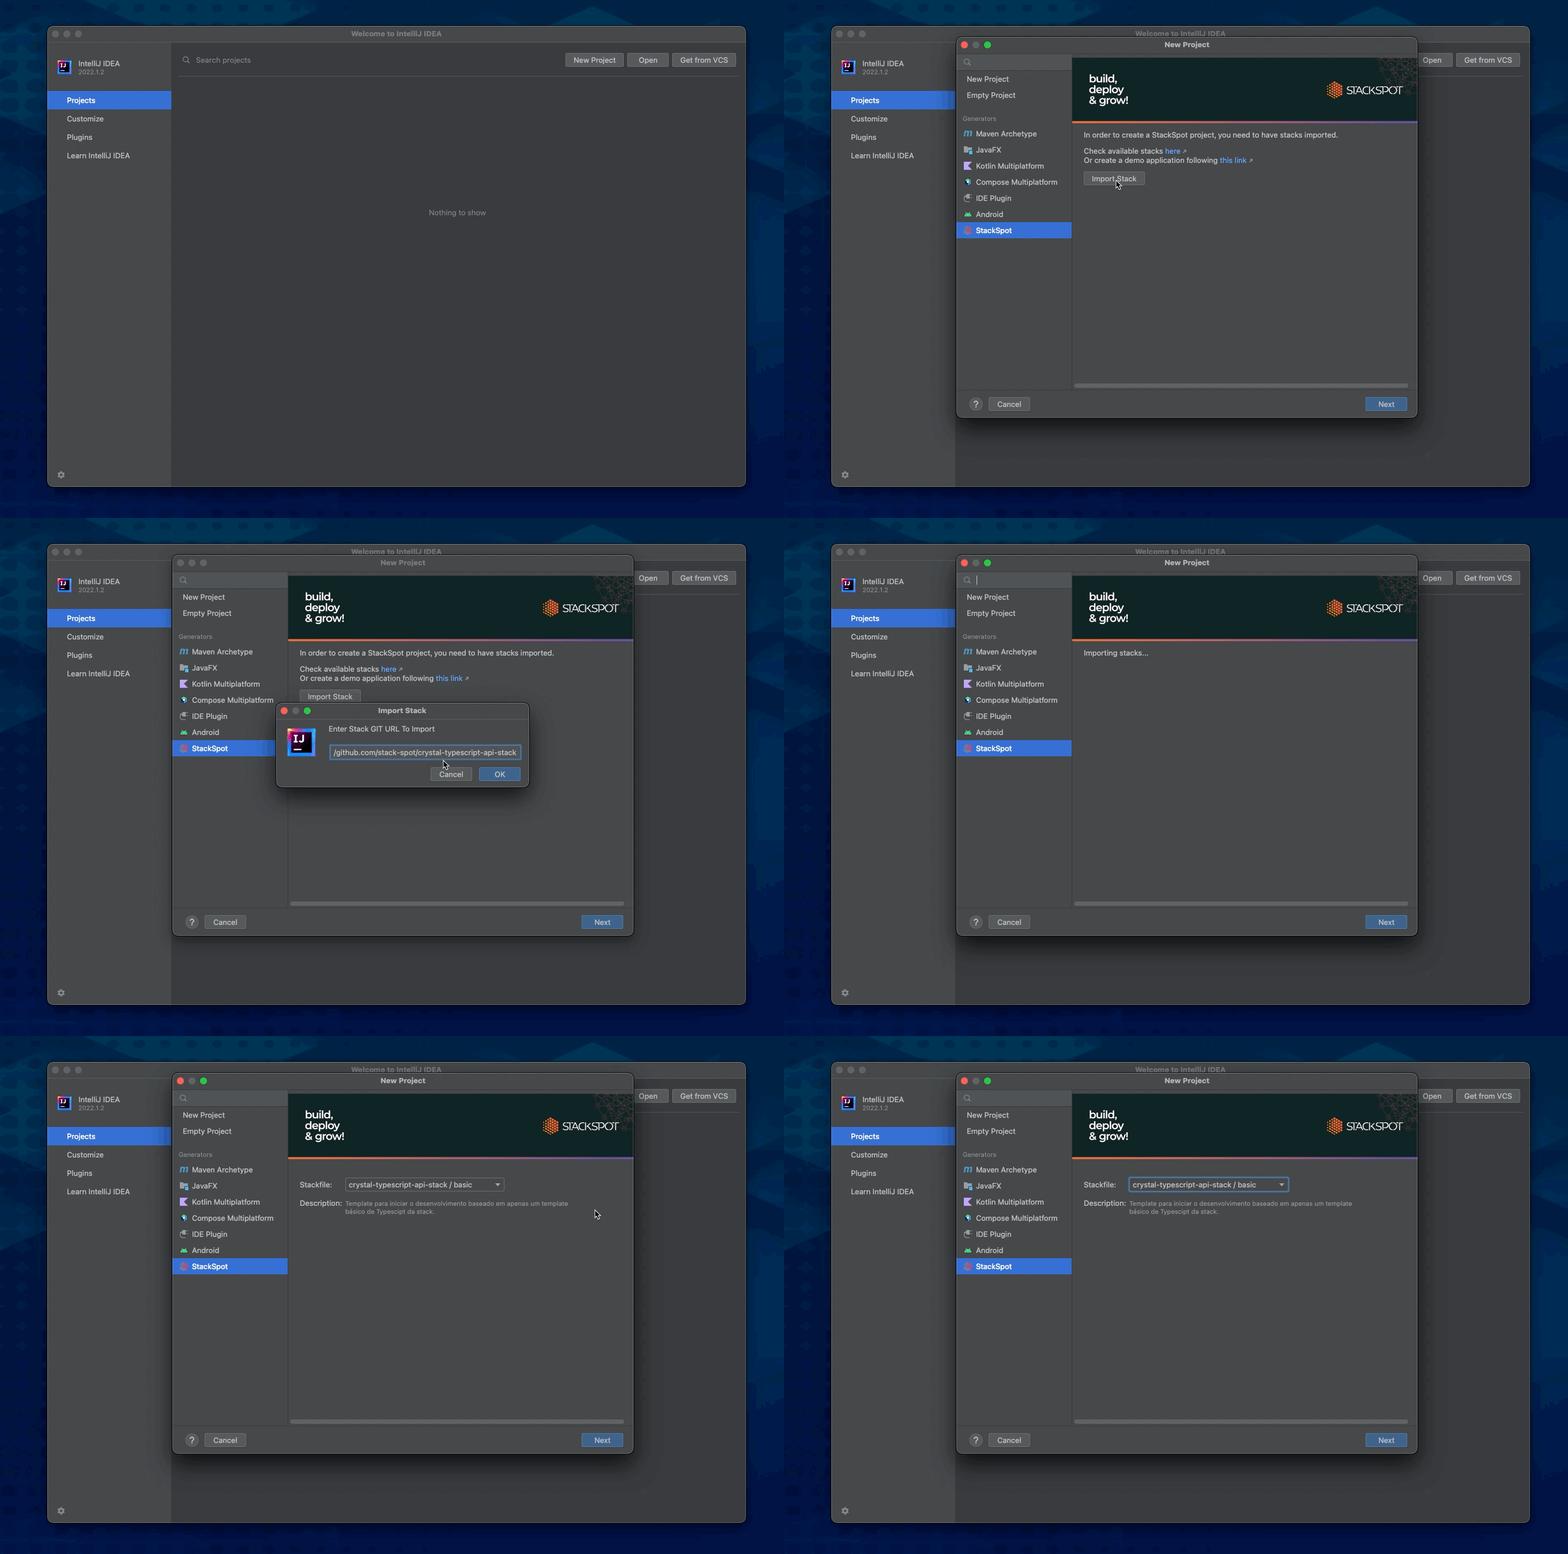
Step 1. From the IntelliJ home screen, click Project, and then New Project;
Step 2. Under `New Project``` on the left side menu, click on the StackSpot Plugin**;
> While creating a new project, if you haven't imported a Stack yet, the StackSpot Plugin displays a warning and the option to import a Stack under the **Import Stack** button.
Step 3. Access the Studio website and copy the Stack's URL you want to import.
Step 4. Click on the button Import Stack.
Step 5. In the Import Stack window, paste the Stack URL and then click OK..
Step 6. If a project is already open, to import another Stack, in the StackSpot menu on the right side click on the Import Stack button. Then enter the Stack URL you want to import.
Create a Project
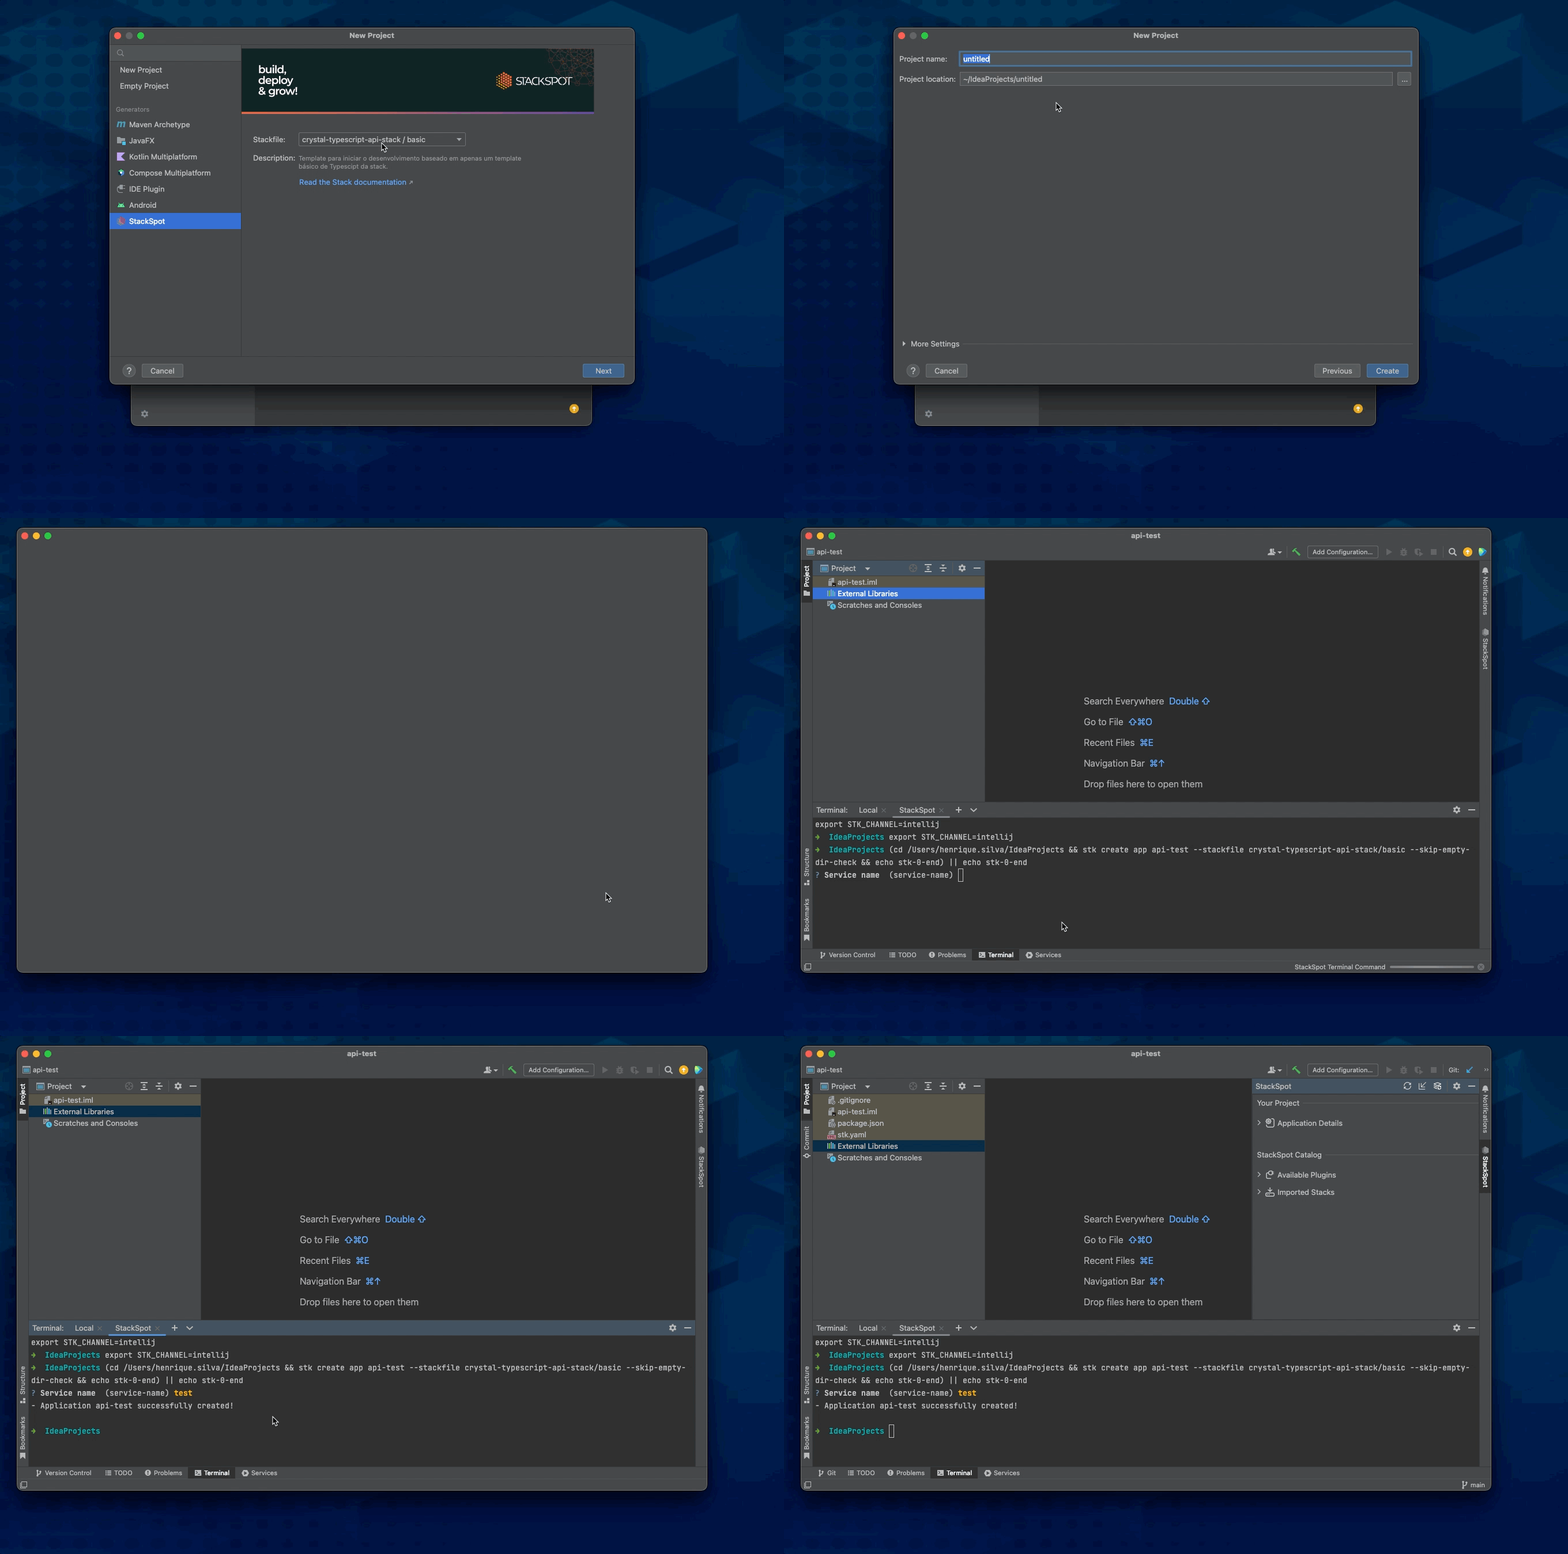
After importing a Stack, to create your project follow the steps below:
Step 1. From the IntelliJ home screen, click on Project and then New Project.
Step 2. In New Project, click on the StackSpot Plugin, on the left side of the screen under Stackfile, and select the Stack and Template you want.
- Example:
stack-name/template-name. - Click
Next.
Step 3. InProject name, type the name of your project and then clickCreate. Wait for the project to load and then fill in the inputs for the selected Template in the StackSpot terminal in IntelliJ.
Apply a Plugin
Follow the steps below:
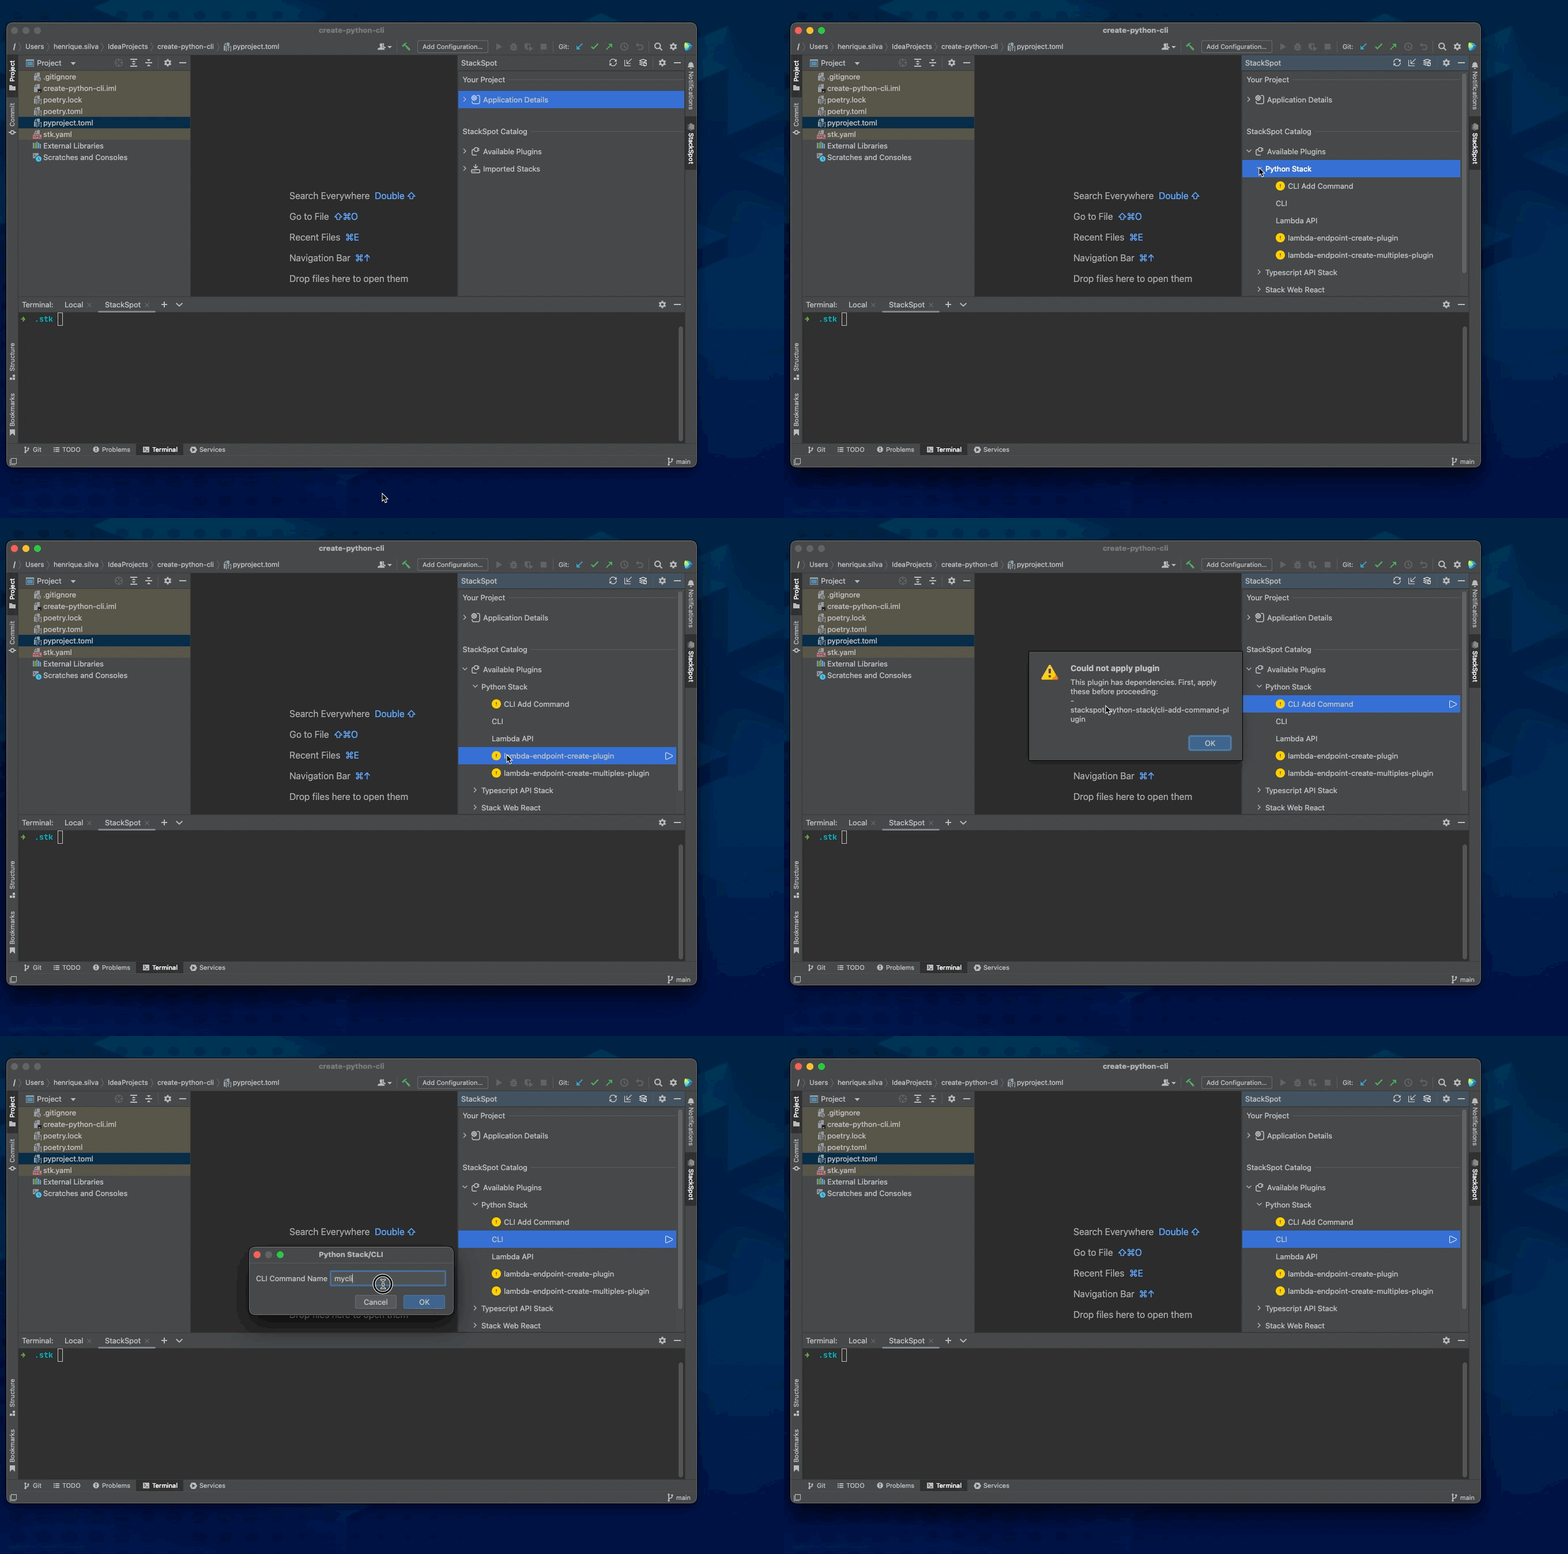
Step 1. Open your project, locate the Available Plugins option in the StackSpot menu, and click on it to show the options. The available Stacks and Plugins will show up.
Step 2. Select a Plugin and click on the Apply Plugin button.
Step 3. If the Plugin has inputs, a screen displays the relative fields of the inputs in the .yaml file.
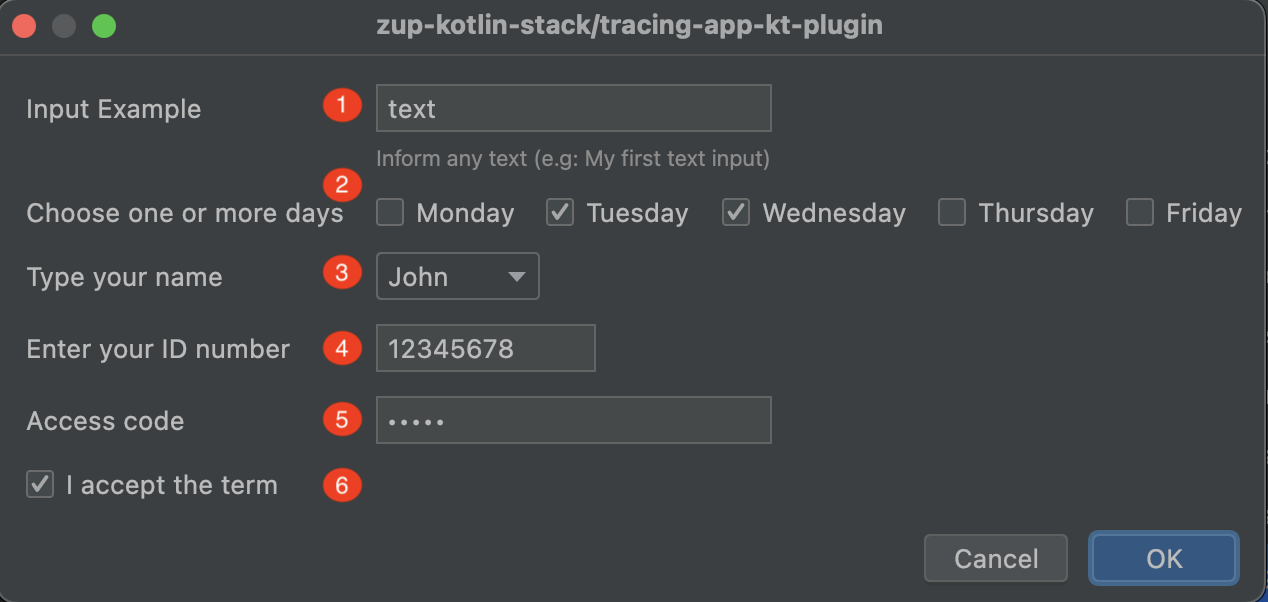
textfield.multiselectfield.- text
withitems` (list) field. int(allows up to 8 digits) field.password(hidden value in the format:****) field.boolfield.
See the .yaml file with the inputs from the screen above:
inputs:

  - label: Input Example
    type: text
    name: example
    default: text
    required: true
    help: "Inform any text (e.g: My first text input)"
    pattern: "[A-Za-z]*"

  - label: Choose one or more days
    name: days
    type: multiselect
    items:
      - Monday
      - Tuesday
      - Wednesday
      - Thursday
      - Friday

  - label: Type your name
    name: name
    type: text
    items:
          - John
          - Bill

  - label: Enter your ID number
    name: id_number
    type: int

  - label: Access code
    name: access_code
    type: password

  - label: I accept the term
    name: accept_term
    type: bool
Step 4 You can add more options to the fields on the screen via the inputs in the .yaml file. See the options with the .yaml samples below:
required: Indicates whether a field is optional or not.

inputs:
  - label: Input Example
    type: text
    name: example
    required: true
help: Supporting text for input.
inputs:
  - label: Input Example
    type: text
    name: example
    help: "Inform any text (e.g: My first text input)"
default: Default value. It is associated with a field if there is no value.

inputs:
  - label: Input Example
    type: text
    name: example
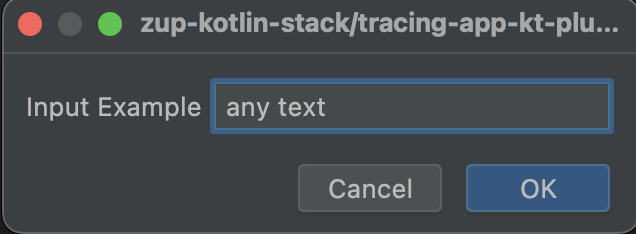
    default: any text
pattern: Set up a field validation with regex.

inputs:
  - label: Input Example
    type: text
    name: example
    pattern: "[A-Za-z]*"
condition: After receiving a value in the field, a condition is set for a second field to be on the screen. If the condition is not met, nothing happens.
The valid operator values are:
==,!=,>,>=,<,<=,containsAny,containsAll,containsOnly,notContainsAnyenotContainsAll.

Below are some examples of .yamls files of valid operator values:
- Compare if the values are equal: ==
        inputs:

          - label: Input Example
            name: name
            type: text

          - label: Choose one or more days
            name: days
            type: multiselect
            items:
              - Monday
              - Tuesday
              - Wednesday
              - Thursday
              - Friday
            condition:
              variable: name
              operator: "==:
              value: "weekdays"
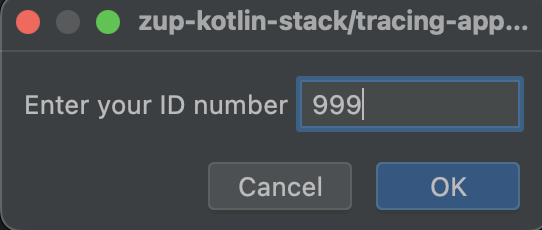
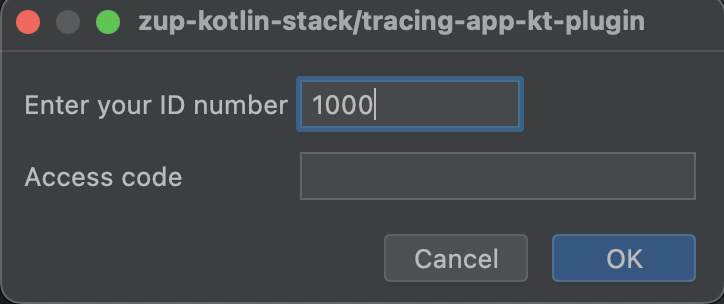
- Compares whether one value is equal to or greater than the other: >=
        inputs:
          - label: Enter your ID number
            name: id_number
            type: int

          - label: Access code
            name: access_code
            type: password
            condition:
            variable: id_number
            operator: ">="
            value: 1000


- Validates that a list contains the value entered in the input: containsAny
        inputs:
          - label: Choose one or more days
            name: days
            type: multiselect
            items:
              - Monday
              - Tuesday
              - Wednesday
              - Thursday
              - Friday

          - label: Type your name
            name: name
            type: text
            items:
              - John
              - Bill
            condition:
              variable: days
              operator: containsAny
              value:
                - Wednesday
                - Friday


- Validates that a list contains the value entered in the input: containsAll
inputs:
  - label: Choose one or more days
    name: days
    type: multiselect
    items:
      - Monday
      - Tuesday
      - Wednesday
      - Thursday
      - Friday

  - label: Type your name
    name: name
    type: text
    items:
      - John
      - Bill
  condition:
    variable: days
    operator: containsAll
    value:
      - Wednesday
      - Friday


- Validates that a list contains only the values entered in the input: containsOnly
    inputs:
      - label: Choose one or more days
        name: days
        type: multiselect
        items:
          - Monday
          - Tuesday
          - Wednesday
          - Thursday
          - Friday

      - label: Type your name
        name: name
        type: text
        items:
          - John
          - Bill
        condition:
        variable: days
        operator: containsOnly
        value:
          - Wednesday
          - Friday
If an A field has a conditional on a B field that also has a conditional and the condition of both are met, they will be displayed on the screen. But if the conditional of field B is not met, only the field will disappear from the screen and, when clicking the ok button, a dependency message for field B will be displayed.


        inputs:

        - label: Input Example
            name: name
            type: text

        - label: Choose one or more days
            name: days
            type: multiselect
            items:
              - Monday
              - Tuesday
              - Wednesday
              - Thursday
              - Friday
            condition:
            variable: name
            operator: "=="
            value: "weekdays"

        - label: Type your name
            name: name
            type: text
            items:
              - John
              - Bill
            condition:
            variable: days
            operator: containsOnly
            value:
              - Wednesday
              - Friday
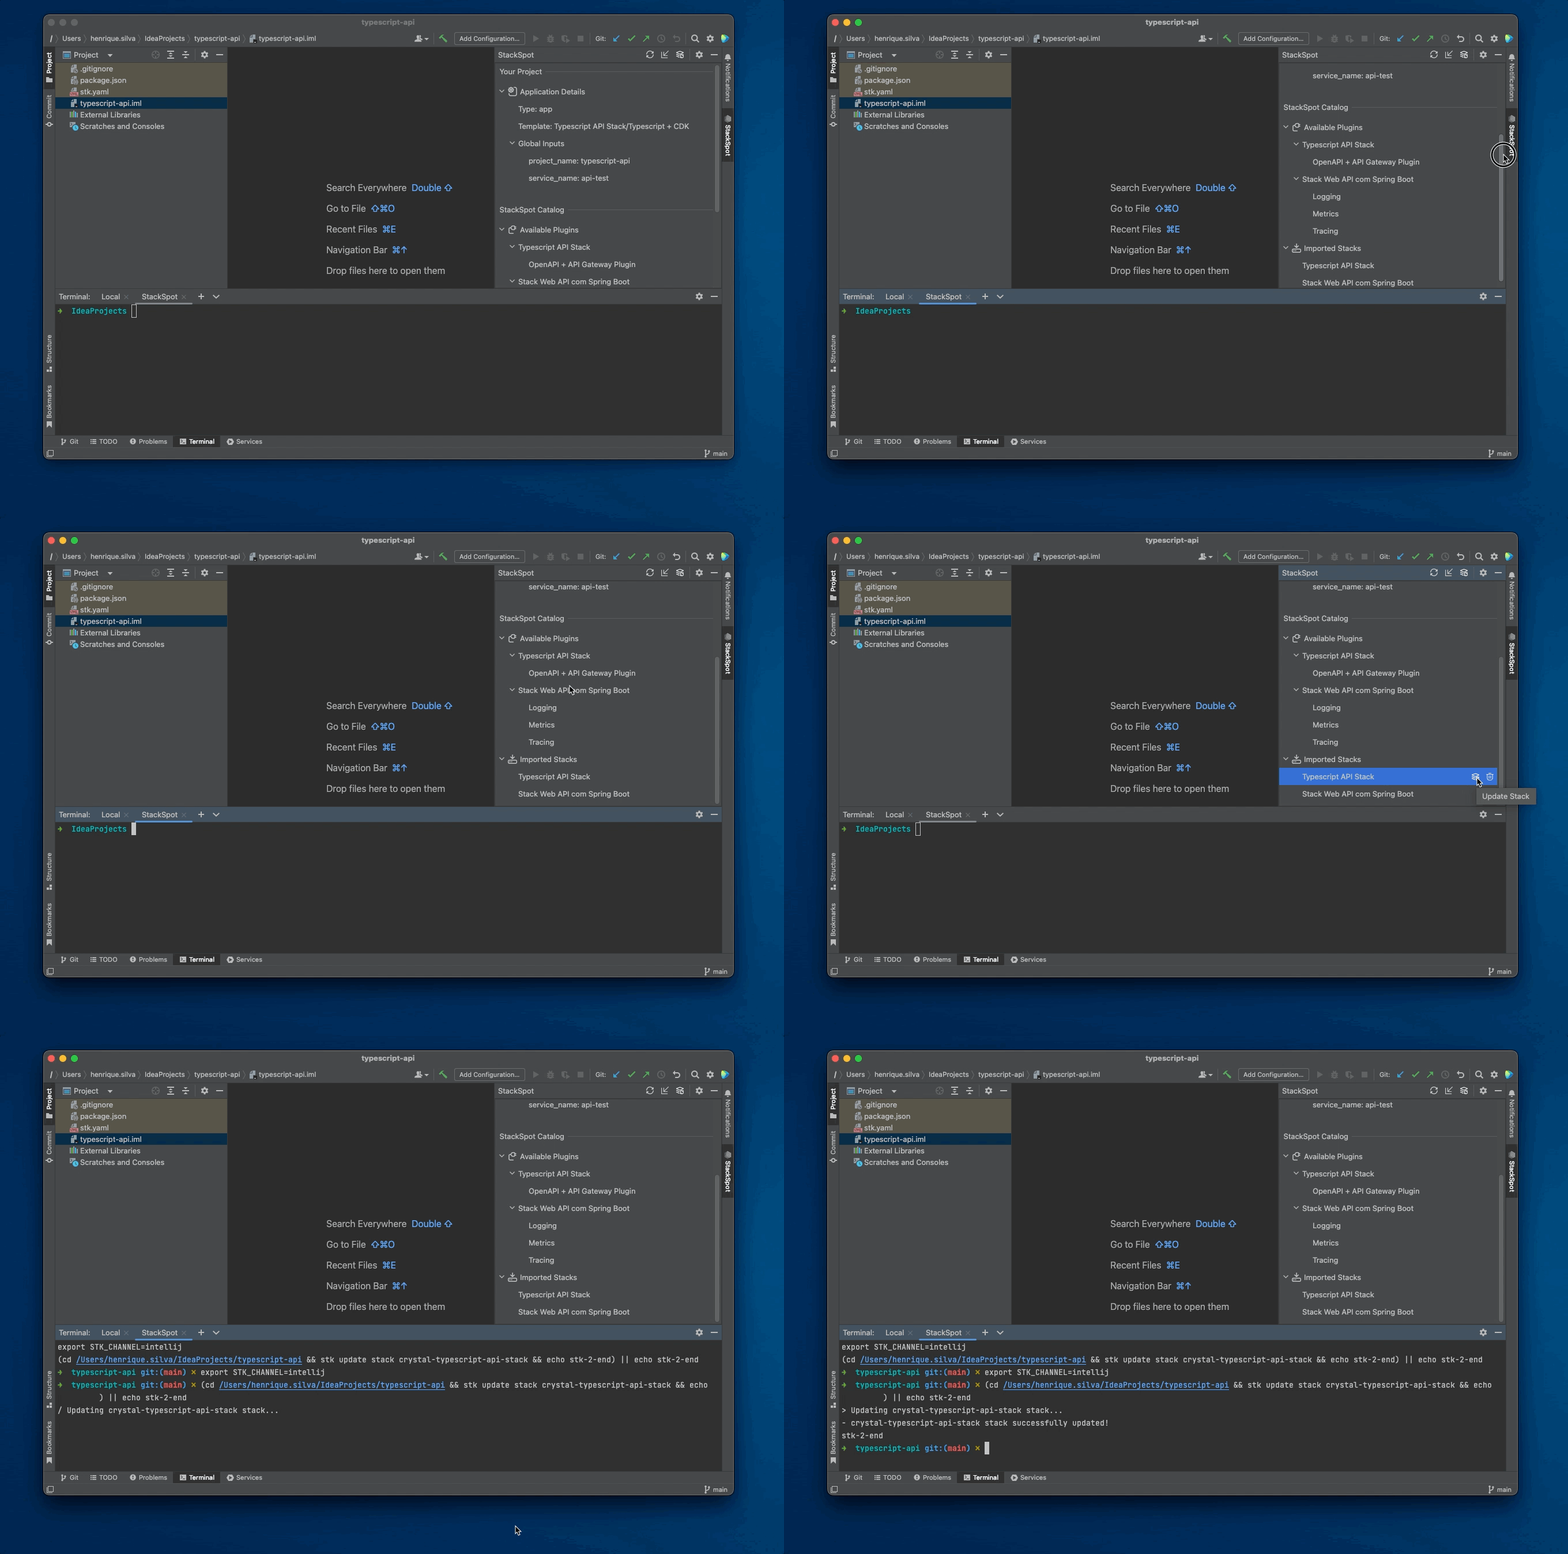
Update a Stack
Follow the steps below:
Step 1. Open your project, locate the Imported Stacks option in the StackSpot menu, and click on it t show the options. The imported Stacks will show up.
Step 2. Select a Stack and click on the Update Stack button.
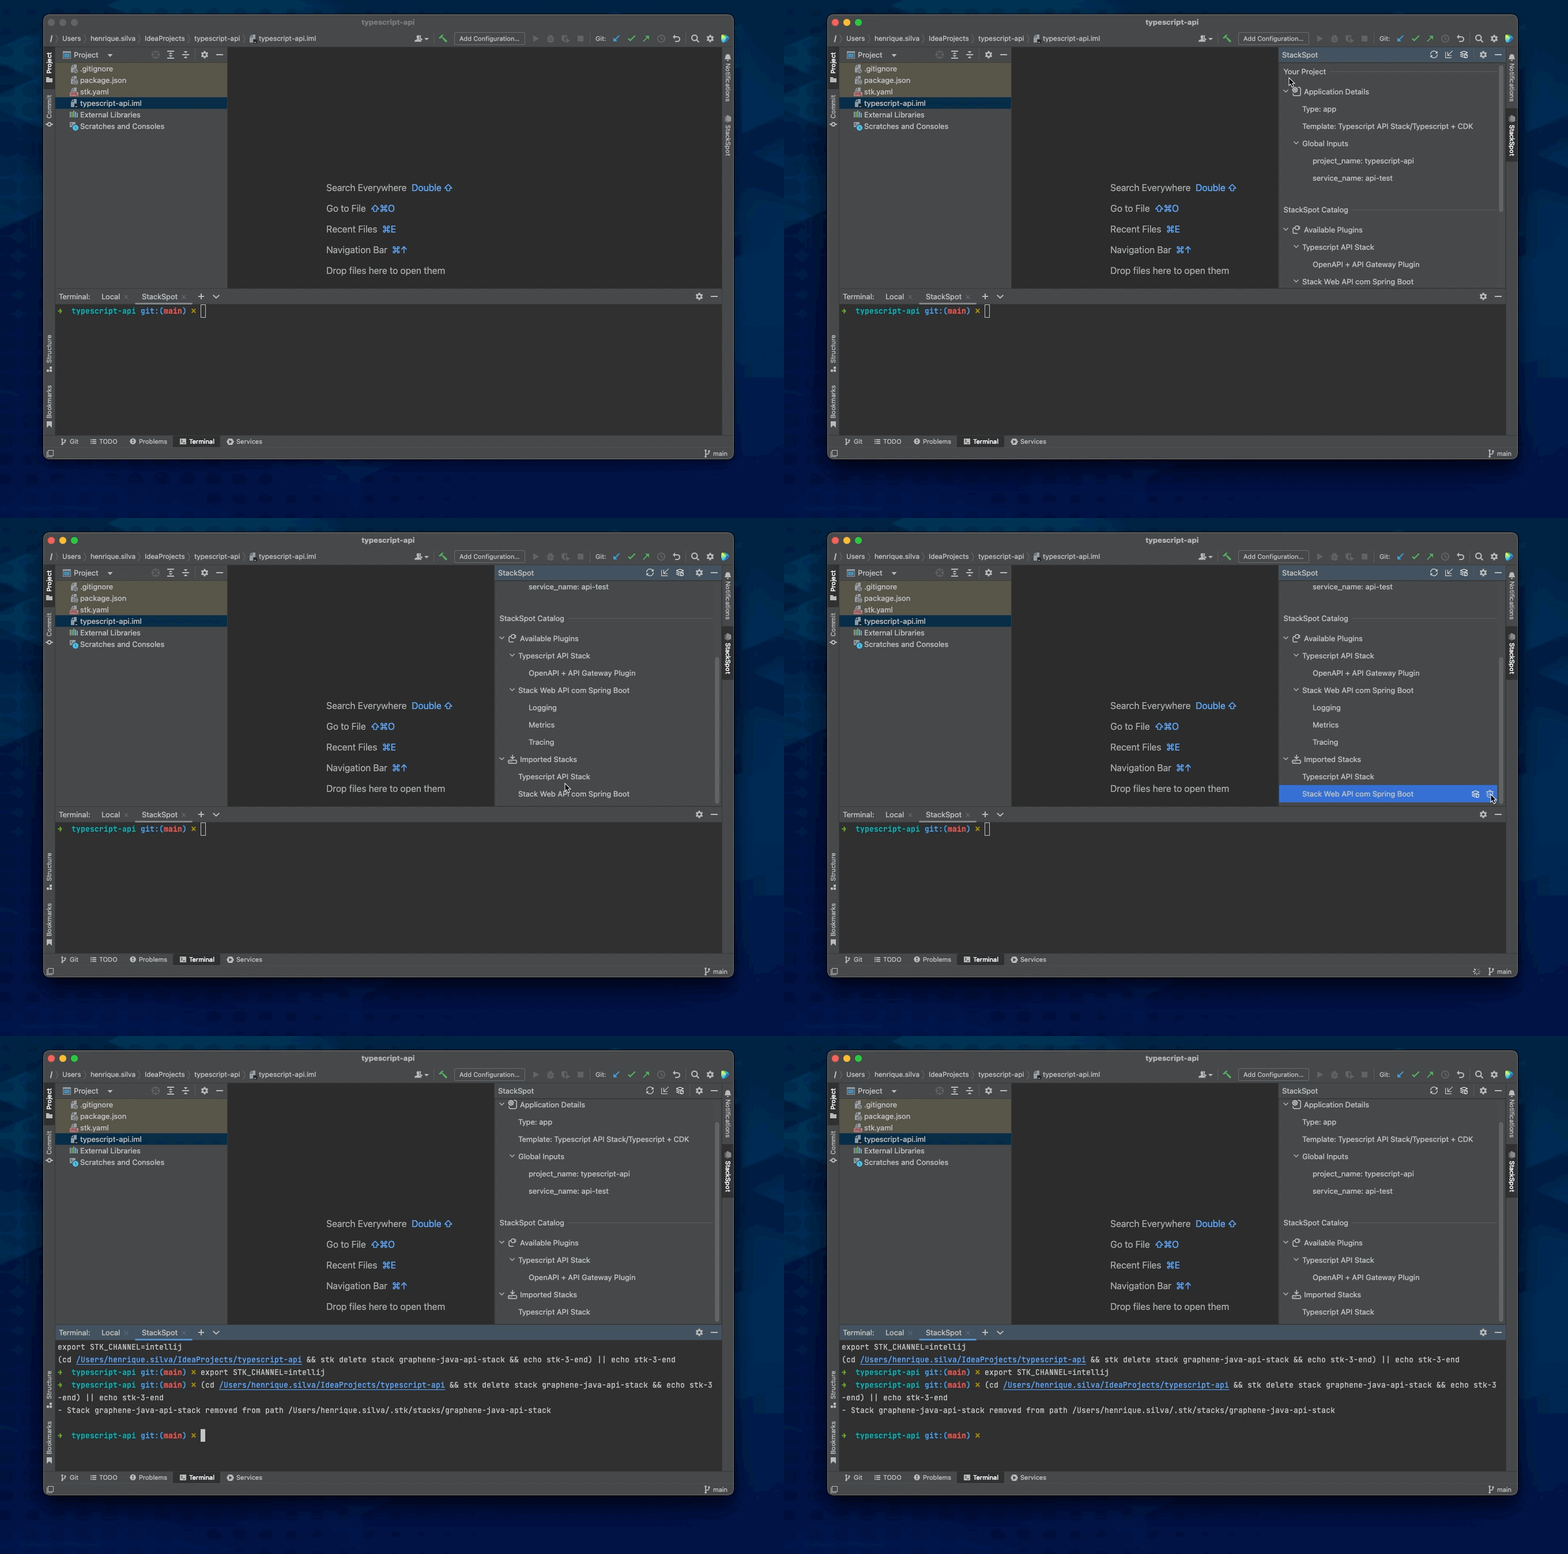
Delete a Stack
Follow the steps below:
Step 1. Open your project, locate the Imported Stacks option in the StackSpot menu, and click on it to show the options. The imported Stacks will show up.
Step 2. Select a Stack and click on the Delete Stack button.
Learn more
Quickstart to use a Stack.- Read more about the
StackSpot commands.
Was this page helpful?